Create a Blank Survey
If you need to create a survey from scratch, a Blank Survey is your best choice. All sections and elements that you’ll need to create your survey will be available in the Survey Builder.
🎥For a video guide, click here to watch our YouTube video.
Choosing the Survey
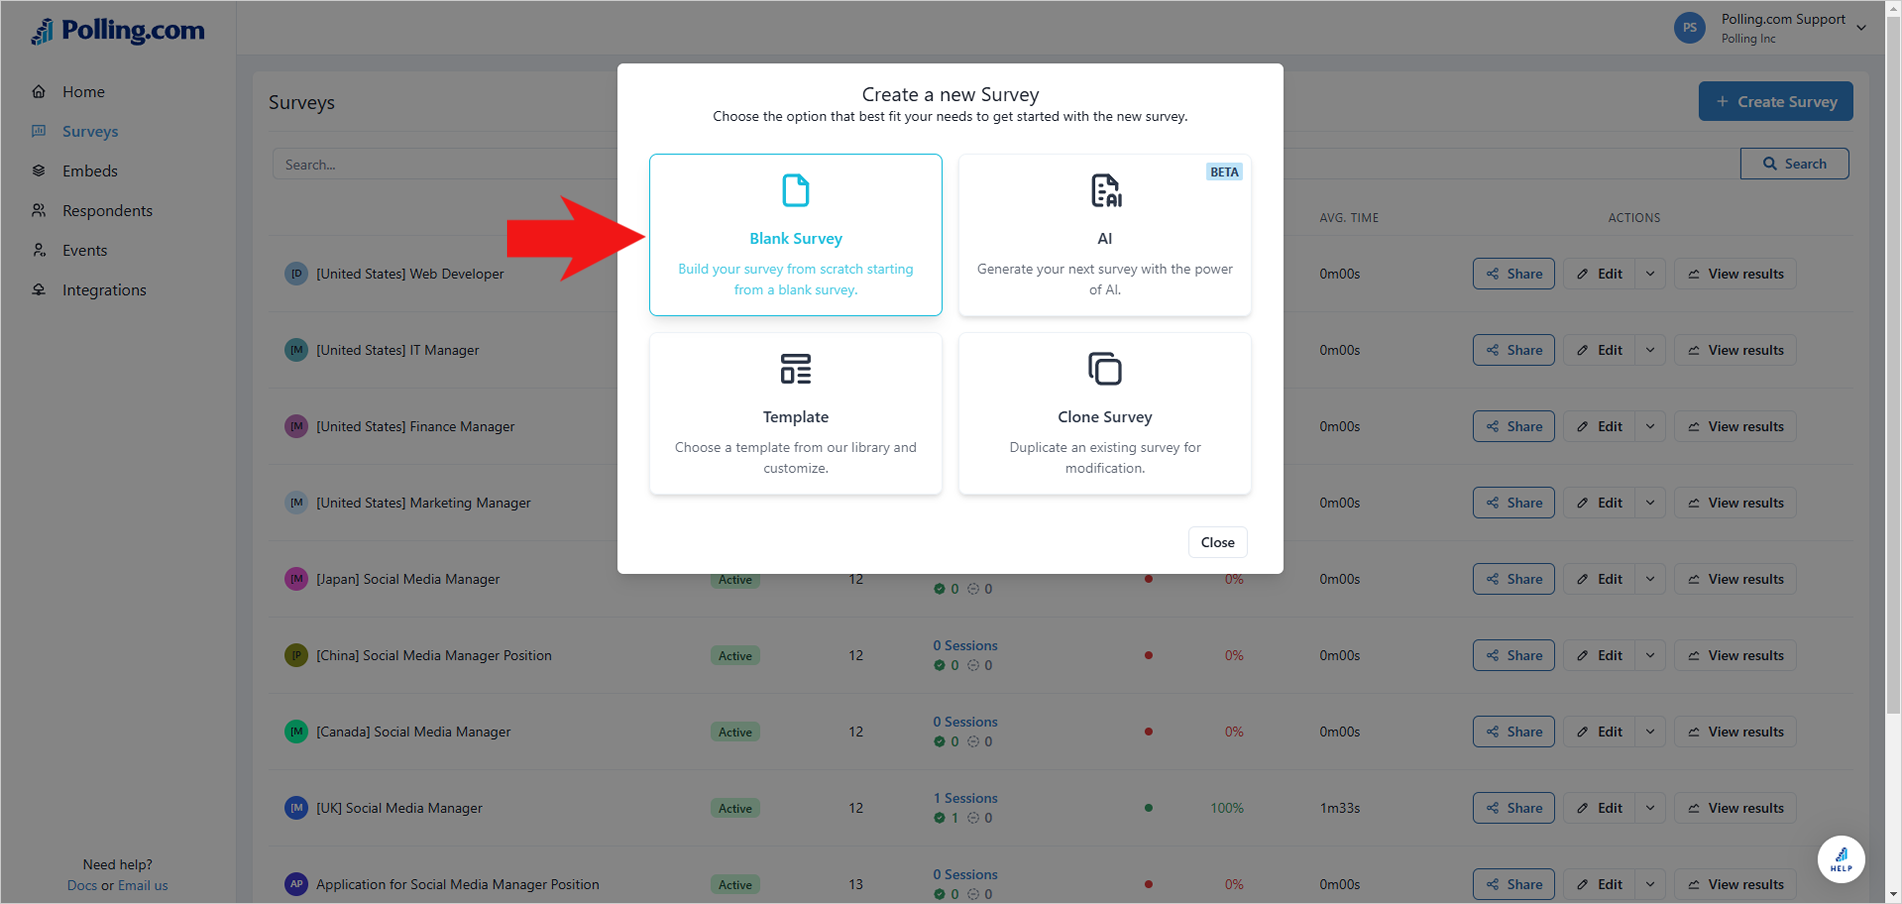
- Go to Surveys and click “+ Create Survey”.
- Choose “Blank Survey”.
- Type the name of your survey and its description.
- Click “Next”.

Adding Intro/Welcome Page
Adding an Intro or Welcome Page to your survey is a great way to greet your respondents. This page allows you to provide a brief introduction about the purpose of the survey, giving respondents an idea of what to expect. You can create multiple
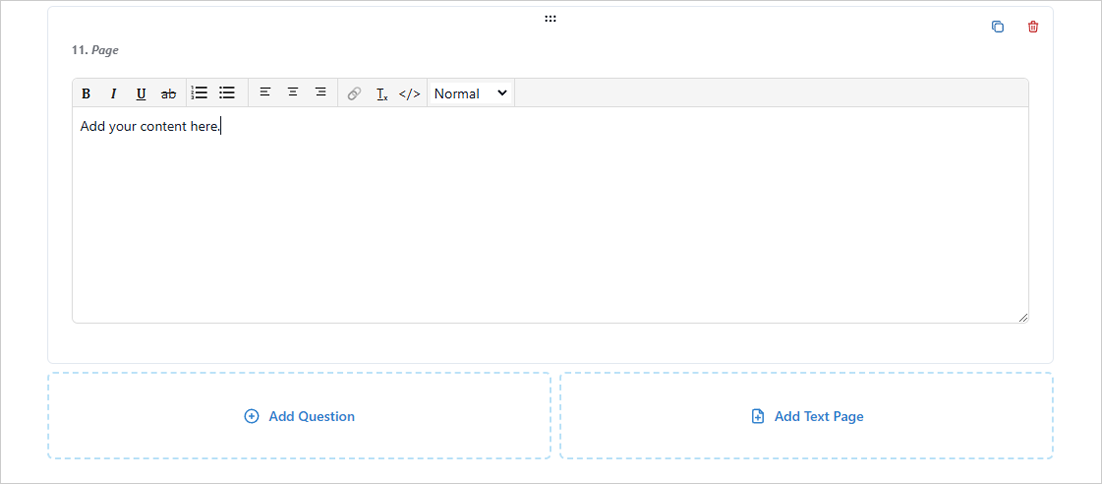
- Hit “Add Text Page”.
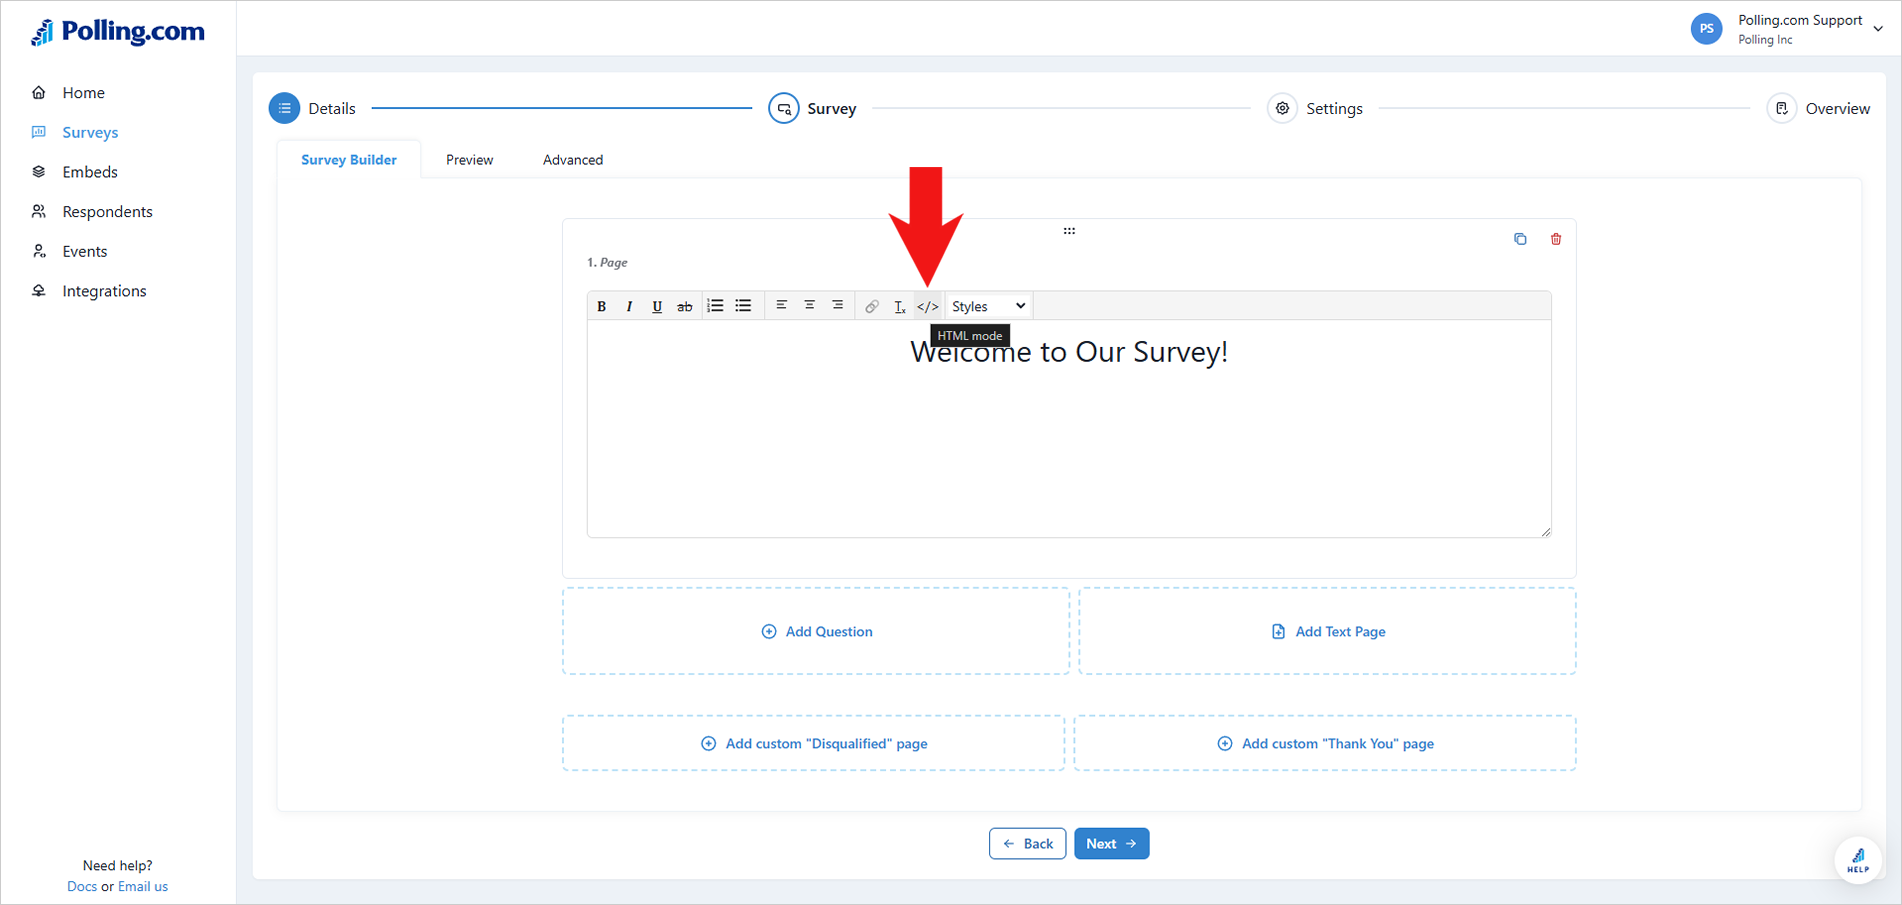
- Type your survey’s intro or welcome message. Use the different tools found in the Formatting Bar to customize your text.
💡You can switch to HTML mode to access the page’s code and format the page using HTML.
Adding Questions and Choices
- Click “Add Question”.
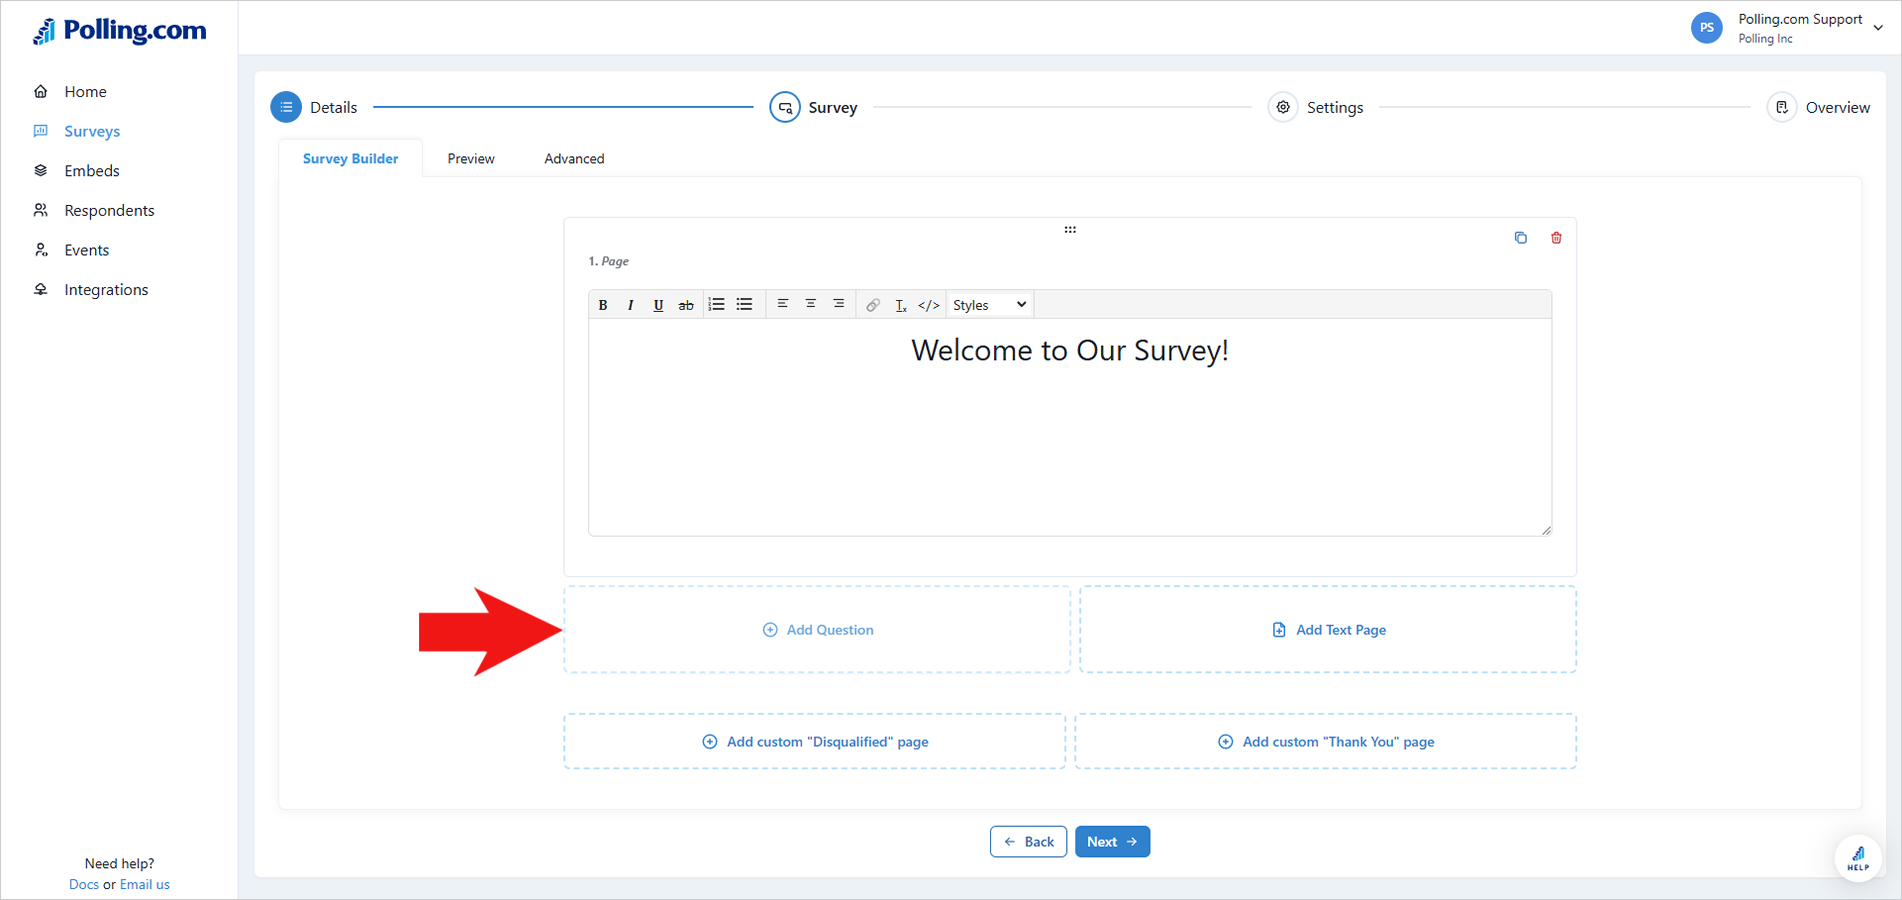
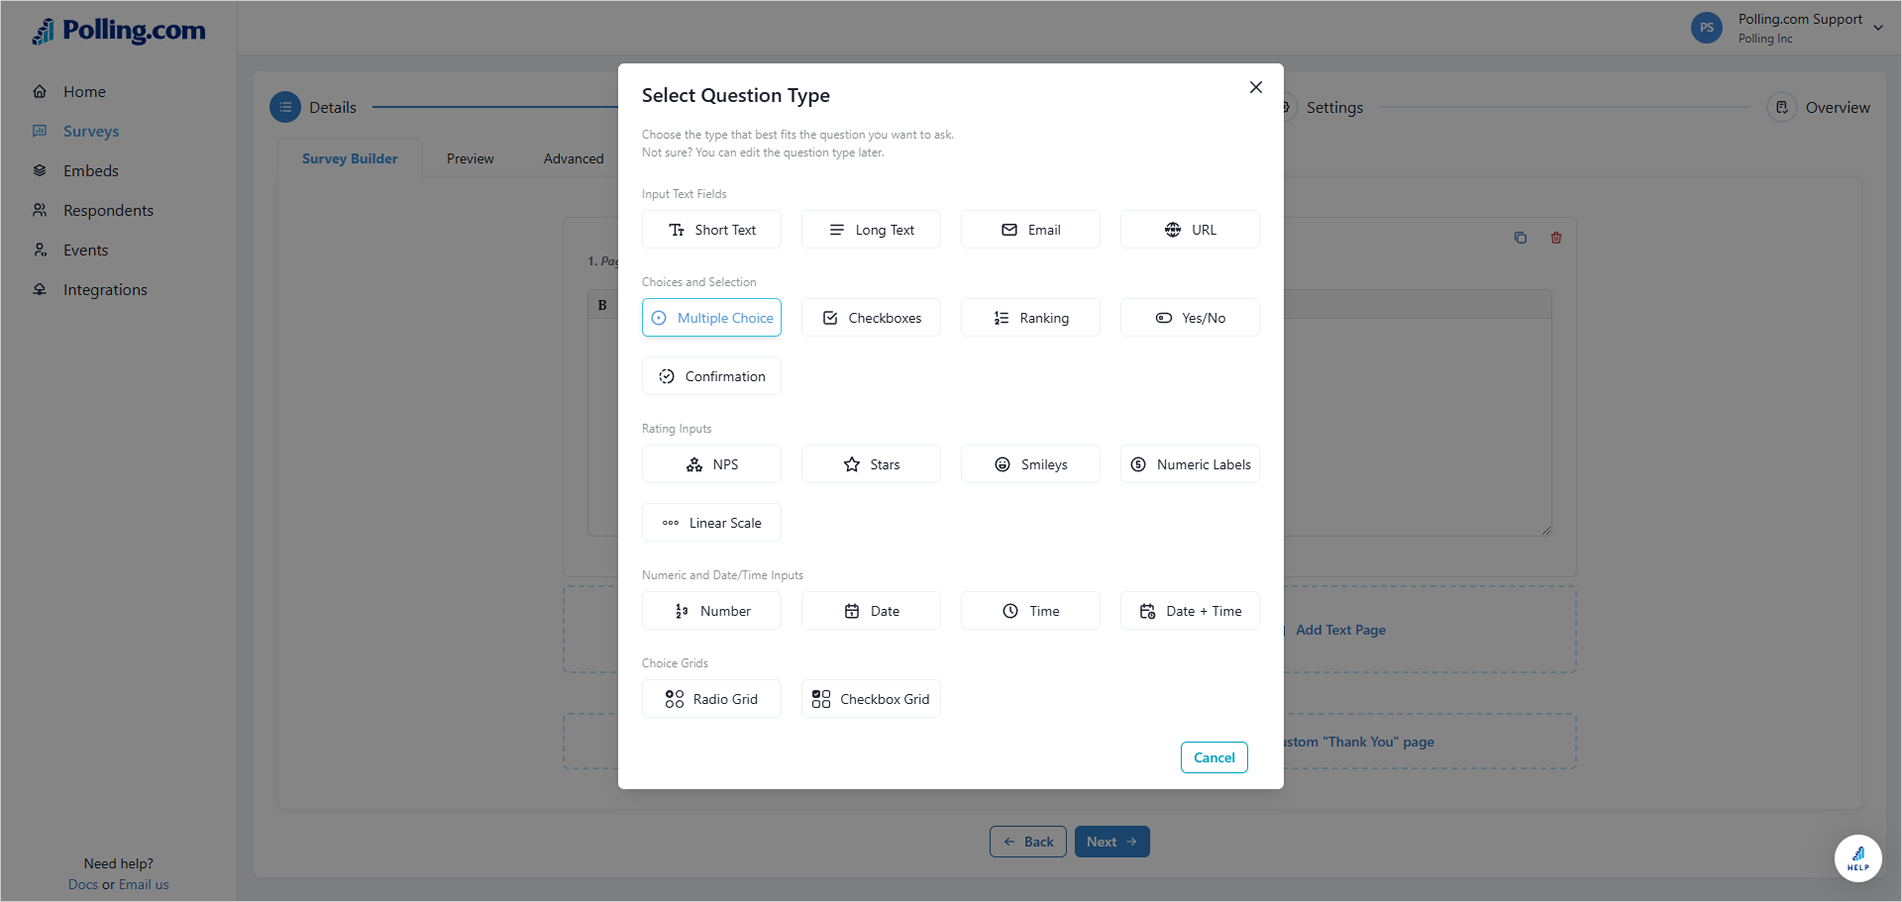
- Select the Question Type you want to use.
🎥You can also create a Star Rating Question or Grid Question to help you maximize the gathering of information from respondents based on their feedback.
- Type the question.
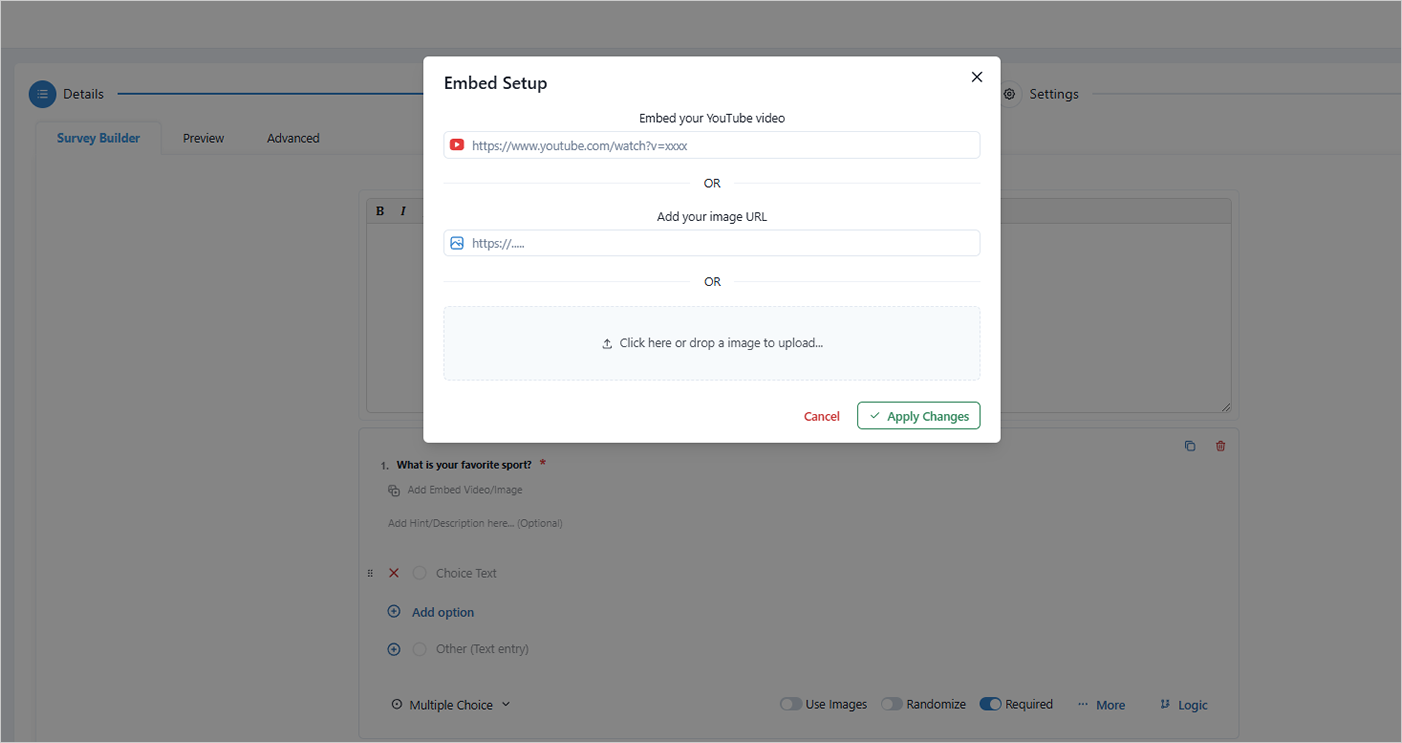
- If you want to attach a video, you can click “Add Embed Video/Image”.
You can add the link of your YouTube video, image URL, or upload an image.
🎥Watch this video on how to embed images and videos in your surveys.
- Add the options.
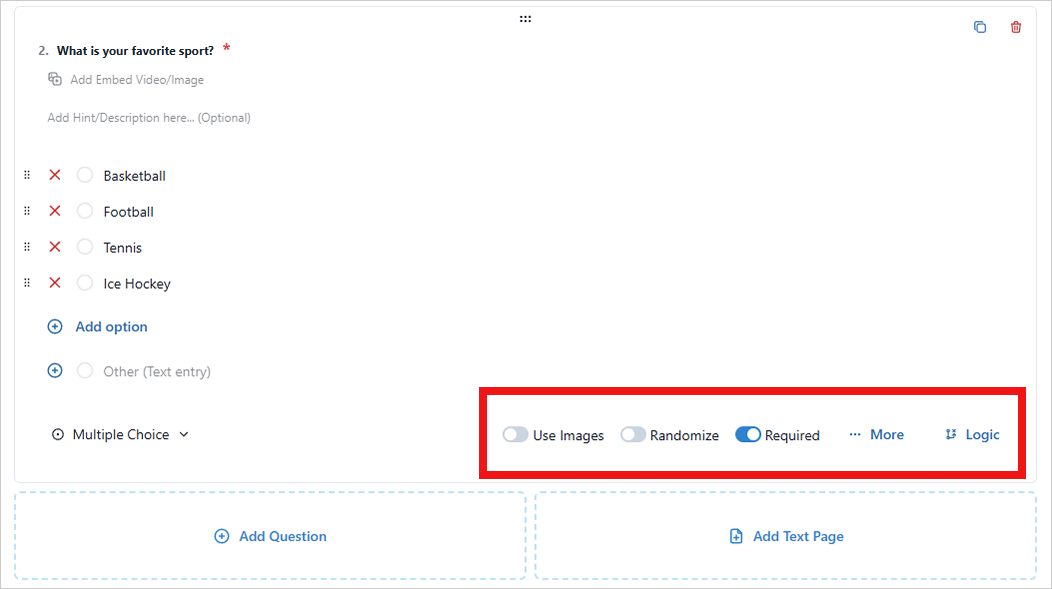
- Aside from adding text, there are also options and field properties that you can use:
- Use Image: Activating this toggle will convert the current input text fields to an image.
- Randomize: Set this option if you want the field to appear at random.
- Required: Activate this toggle to make the field mandatory.
- More Settings: This toggle contains the option to skip the question in the survey.
- Logic Branching: Activate this feature to direct respondents through different paths in the survey based on their answers.
- To add another question, repeat step 1.
Adding Custom Thank You Page
Once you have completed all the survey questions, you can add a custom Thank You page for respondents who successfully finish the survey. To create a custom Thank You page, follow these steps:
- Click “Add custom Thank You Page”.
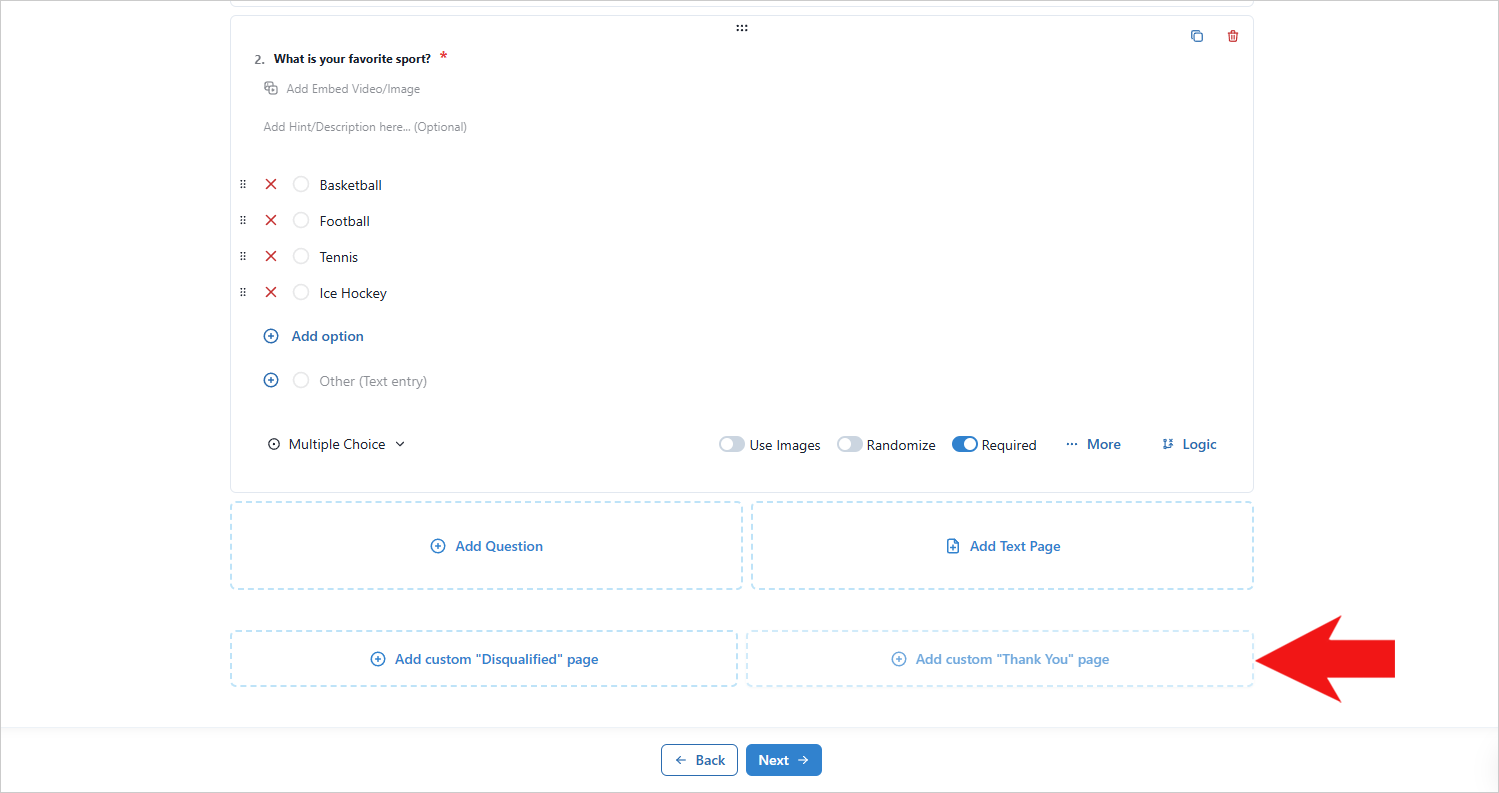
- Type your survey’s thank you message. Use the different tools found in the Formatting Bar to customize your text.
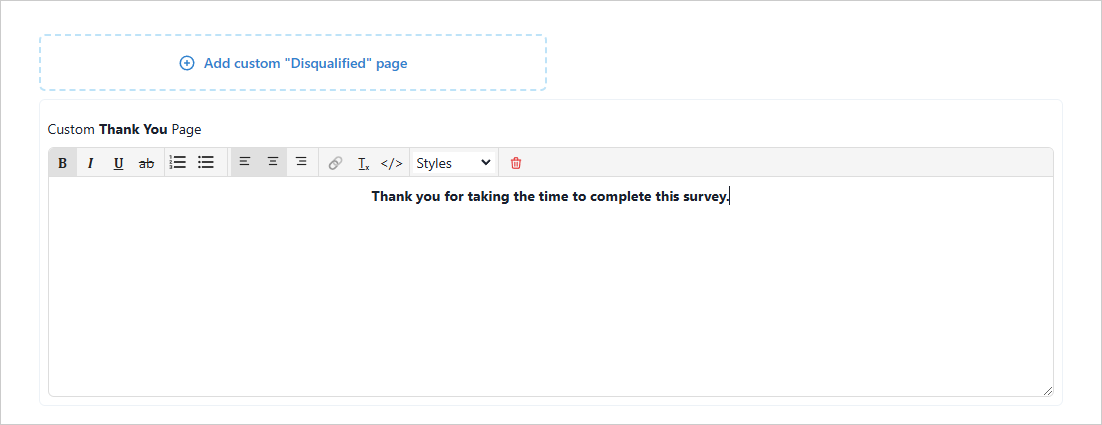
- Click “Next”.
Adding Custom Disqualified Page
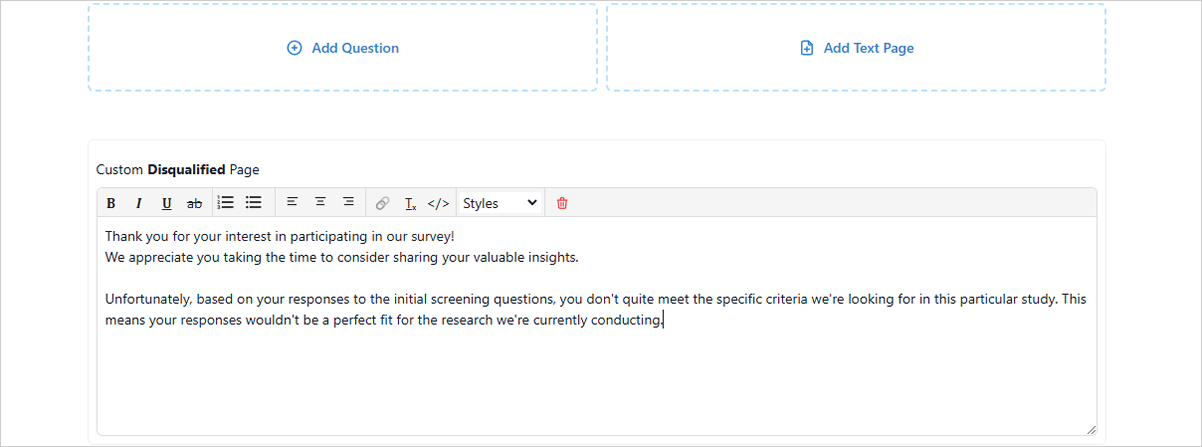
A Disqualified page is shown to respondents who do not meet the requirements for your survey. You can add a message to politely inform them that they are not qualified and express appreciation for their effort in completing the survey.
To add a custom Disqualified page, follow these steps:
- Click "Add custom Disqualified Page".
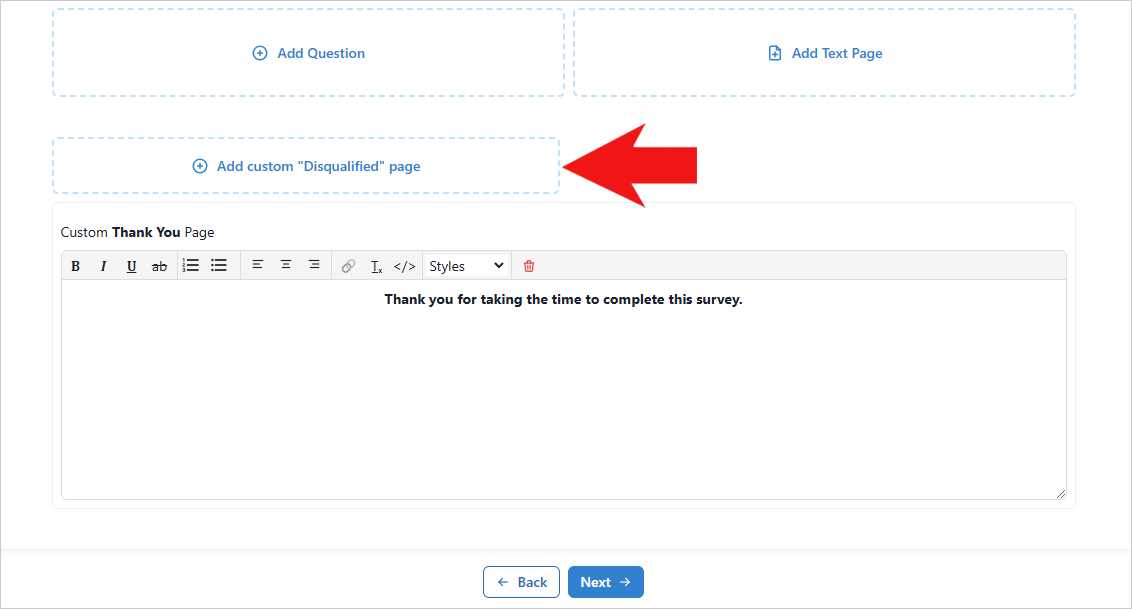
- Type your message.
Adding Text Page
In addition to adding custom Thank You and Disqualified pages, you can also include extra pages to improve your survey for respondents. You can arrange these pages in the order you prefer.
Here's how to add a Text Page:
- Click "Add Text Page".
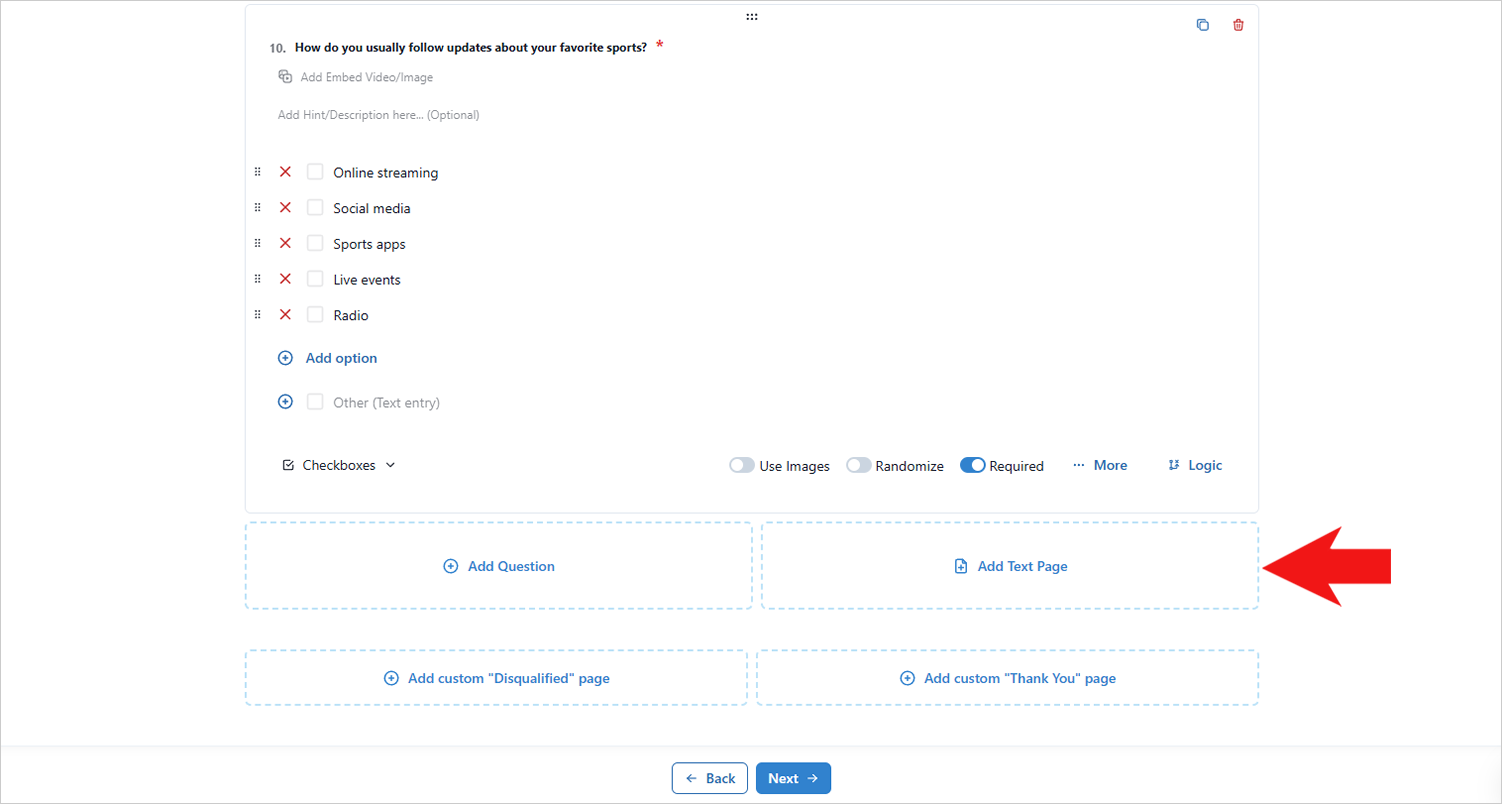
- Add the page's content.
Previewing Survey
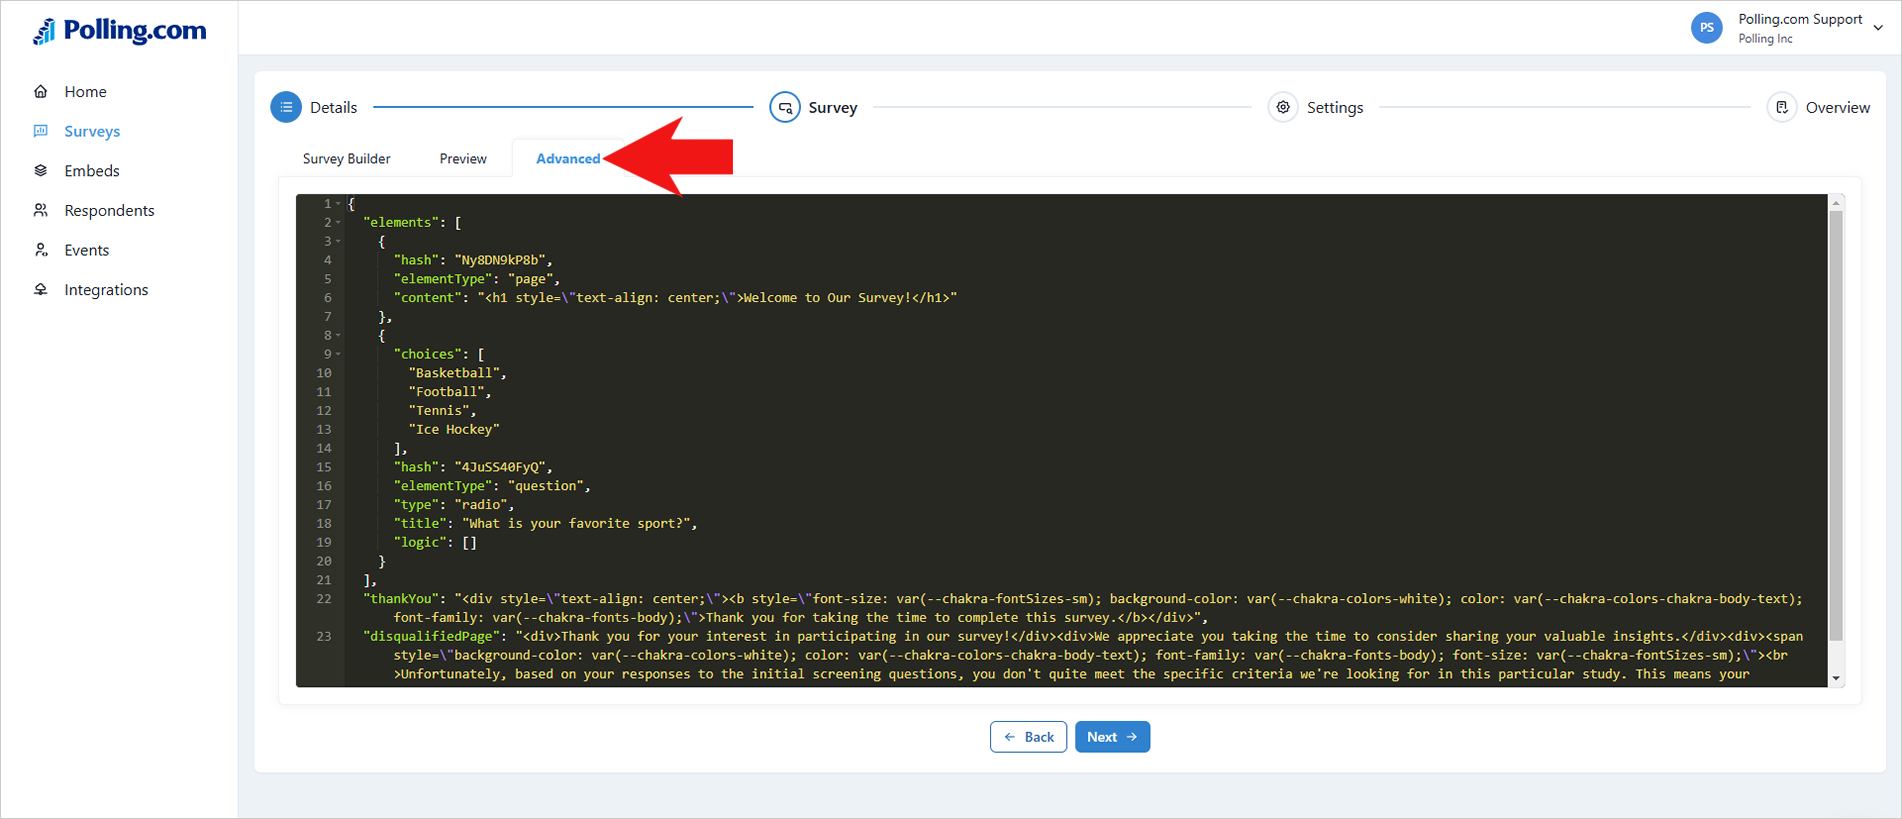
You can instantly see how your survey will look by going to the "Preview" tab.
 If you want to view the source code of the survey, head over to the "Advanced" tab. You can modify the form's code, and any changes you make will be reflected instantly in the Preview tab.
Settings
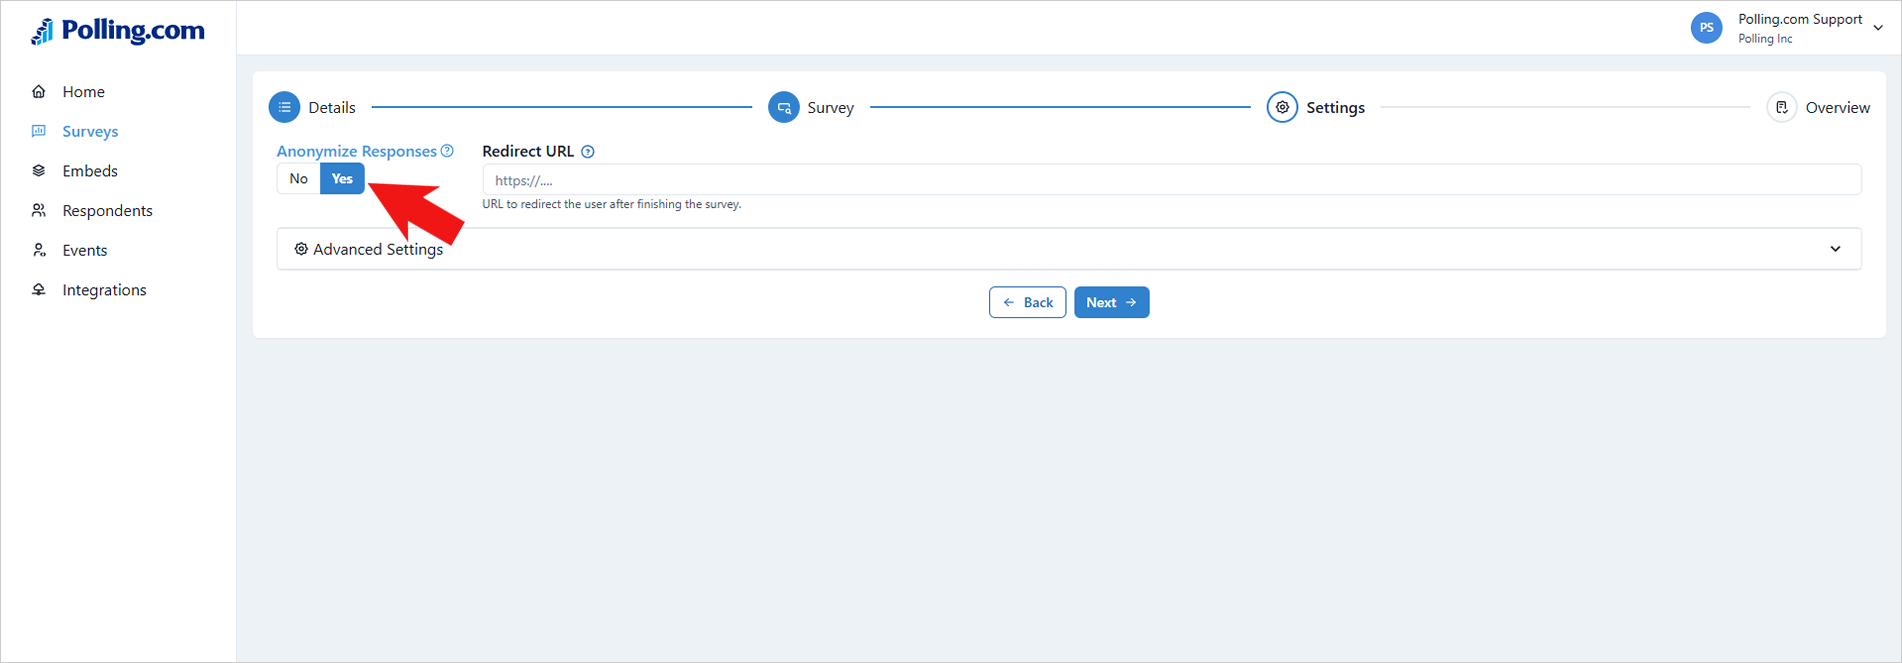
The Settings section allows you to add several configurations to your survey.
Here, you can:
- Enable Anonymous Responses: Collect responses without identifying the respondent.
- Set Redirect URL: Specify a webpage for respondents to be redirected to after completing the survey.
Advanced Survey Settings
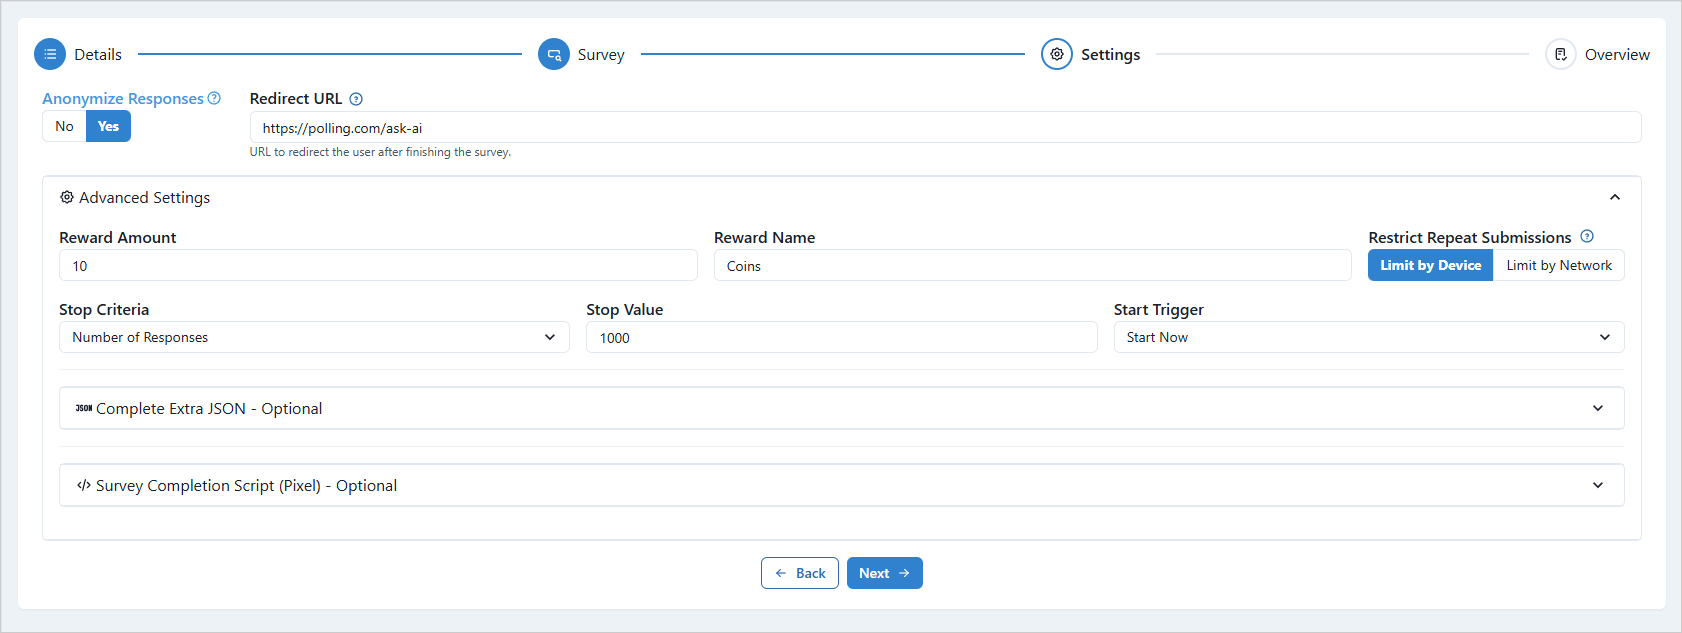
- Reward Respondents: Offer incentives for participation.
- Survey Trigger: You can schedule your survey to automatically close on a specific date or after a certain number of responses.
- Restrict Repeat Submissions: Limit multiple survey responses by restricting submissions based on the device used (cookie) or the respondent's network connection.
- Synchronize Data with JSON: Integrate survey data with other systems.
- Set up Targeting Pixel: Track survey performance and target specific audiences.
 Once you've finished configuring your settings, click "Next."
Overview
The Overview section provides a summary of your survey's details and settings. Review the information carefully. If you need to make any changes, simply click on the relevant section to edit it.
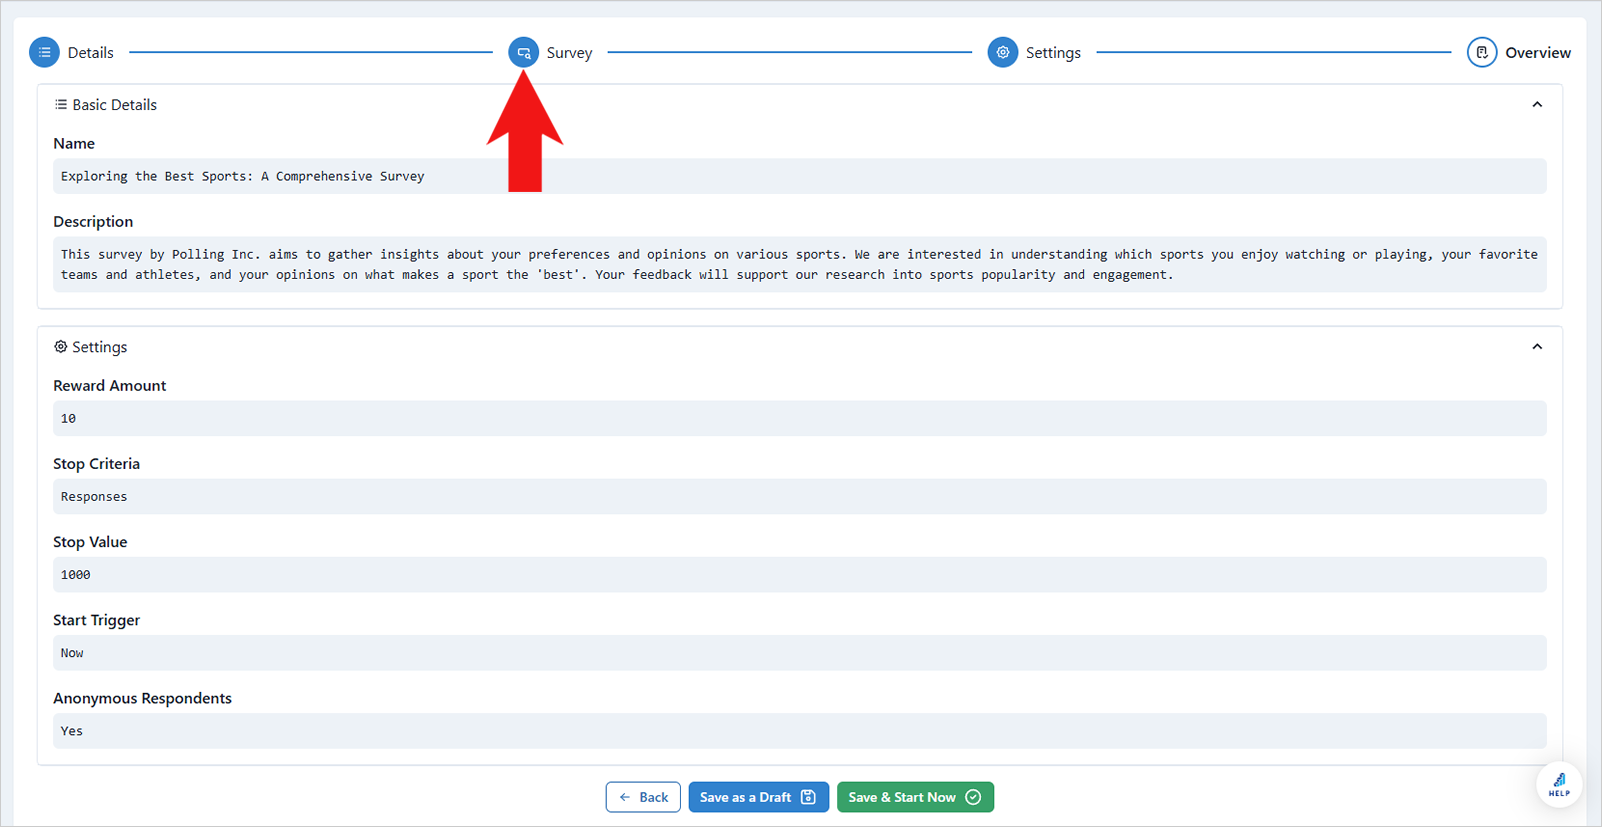 When you're ready to launch your survey, click "Save & Schedule Start." To save your progress and launch it later, click "Save as a Draft."
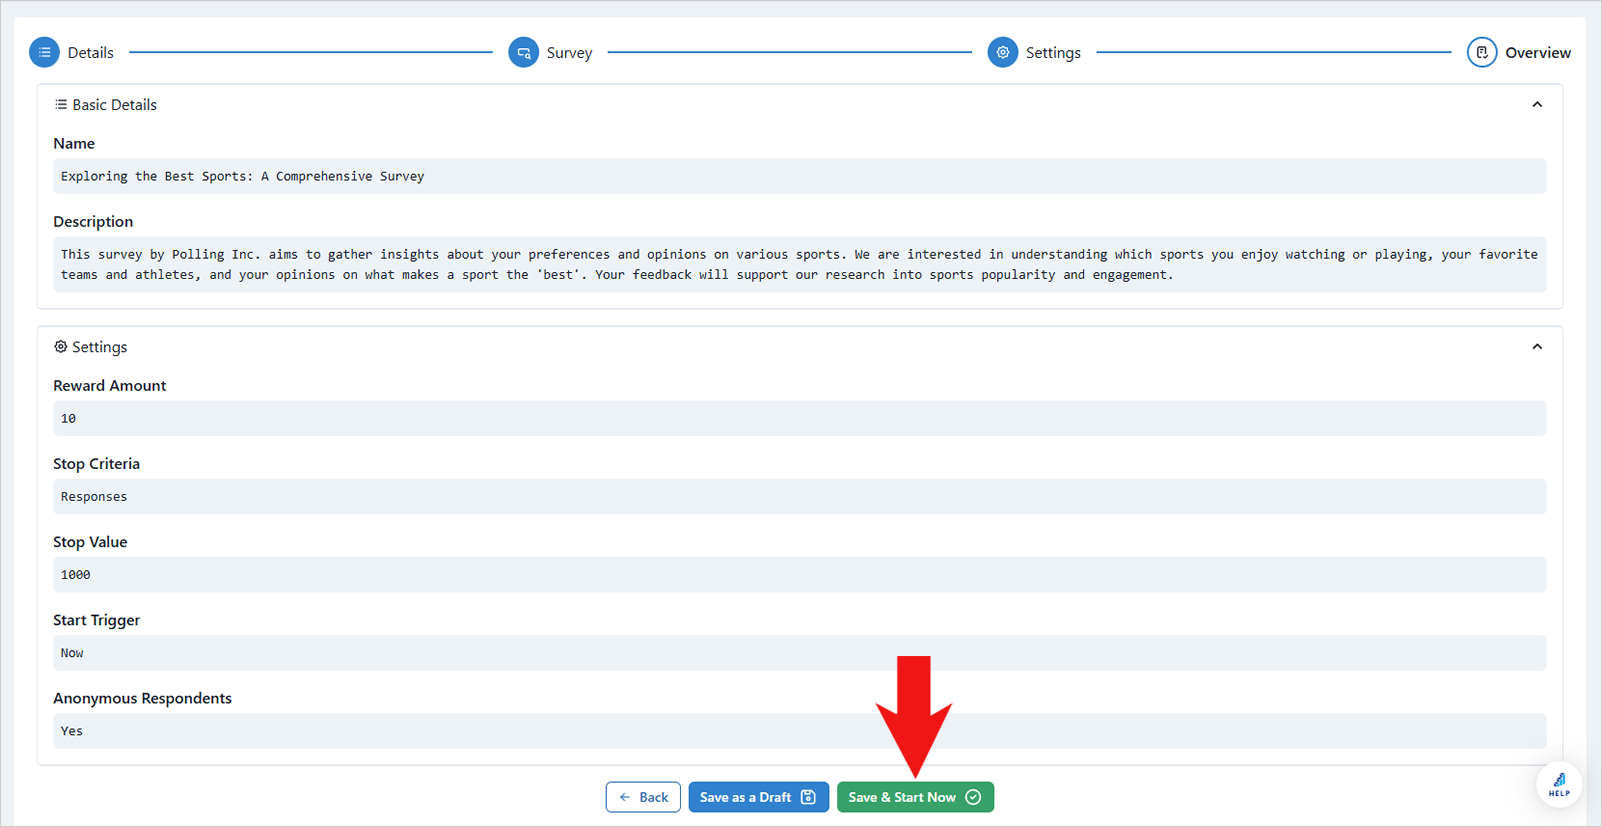
Your completed survey is now ready!
From here, you can:
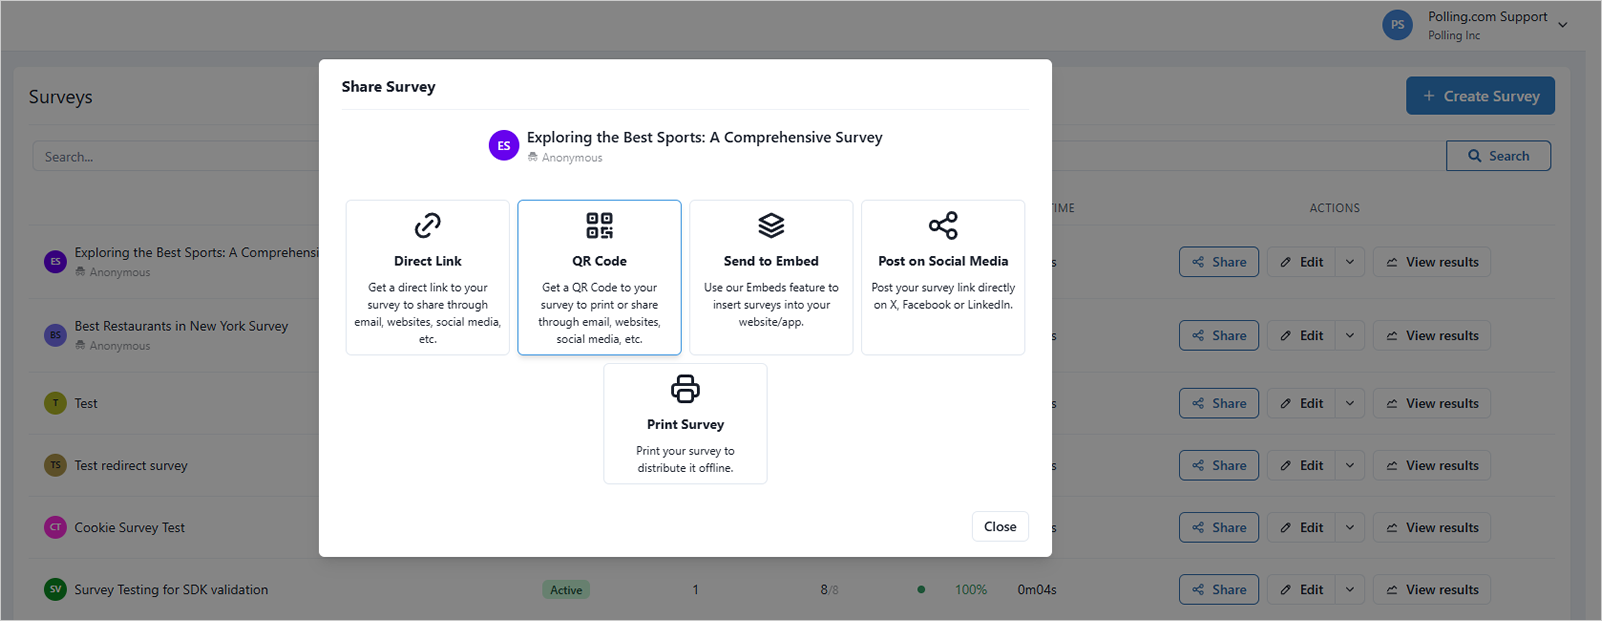
- Get the Direct Link: Copy the direct link to the survey and share it via email, websites, social media, and other online platforms.
- Generate a QR Code: Create a unique QR code for your survey and share it online or in printed materials.
- Embed Your Survey: Integrate your survey into websites or social media accounts to enhance features and accessibility.
- Post on Social Media: Share your survey directly on popular social media platforms like X, Facebook, and Instagram.
- Print the Survey: Print copies of your survey for offline distribution.
